

My Canon 60 DSLR is equipped with a variety of shooting modes that increase the automatic decision making of the camera. It has semi-automatic and manual modes too, which put the control back in your hands for more technical and creative applications.

In PROGRAM mode, the camera sets the exposure, but I can adjust the white balance, ISO, focusing and metering. There are two semi-automatic modes: 1) Shutter Priority (Tv) is where I set the shutter speed and the camera determines the aperture. Shutter Priority allows me to control how “the action” is captured. 2) Aperture Priority (Av) selects the aperture and the camera determines the shutter speed. Aperture Priority allows me to control the depth-of-field.

However, to control the Exposure manually gives me more creative possibilities. There are three adjustable elements – ISO, Aperture and Shutter Speed.
ISO ratings determine the image sensor’s sensitivity to light, each value of the rating represents a “stop” of light, and each incremental ISO number (up or down) represents a doubling or halving of the sensor’s sensitivity to light.
The Aperture controls the lens’ diaphragm, which controls the amount of light traveling through the lens to the film plane. The aperture setting is indicated by the f-number, whereas each f-number represents a “stop” of light.
A lens’s aperture is the opening in the diaphragm that determines the amount of focused light passing through the lens. At a small f-stop, say f/2, a tremendous amount of light passes through, even at a fraction of a second; but at f/22, when the diaphragm is perhaps at its smallest, only a tiny amount of light is let in (even at longer shutter speeds). An interesting thing about the aperture and the f-numbers is that it doesn’t matter the focal length of the lens as long as the f-number is held constant. This is because the arithmetical equation that determines the f-number indicates that the same amount of light passes through the lens on a 35mm lens as on a 100mm lens, with a shutter speed of 1/125s. The size of the diaphragm is unquestionably different, but the amount of light passing through is the same.
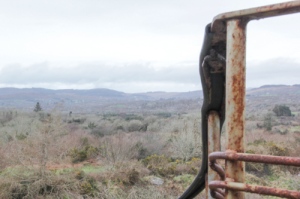
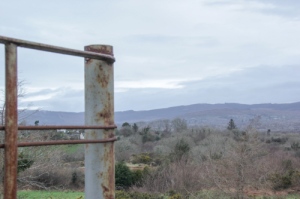
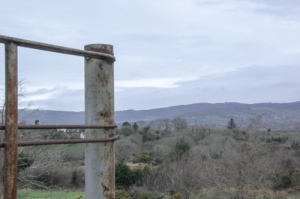
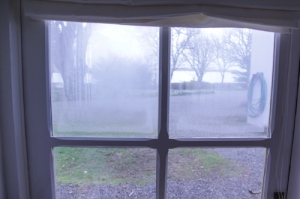
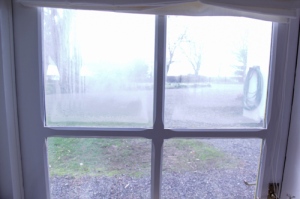
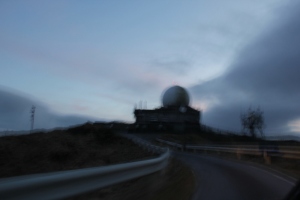
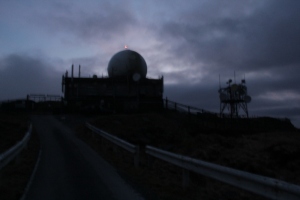
The next 2 images show that changing the aperture from 6,3 to 8 has not much affect. At least for this images.


The next 2 images keep the same aperture but change the light through changing the shutter speed. They are as well a good example for the rule of thirds. The basic principle behind the rule of thirds is to imagine breaking an image down into thirds (both horizontally and vertically) so that you have 9 parts.

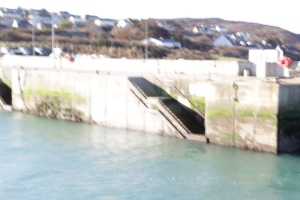
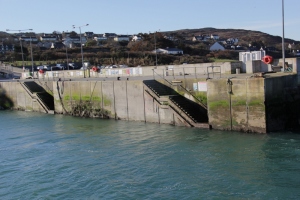
The next 2 images show the different between an aperture of 16 and 29. The rule of thirds keeps one part for the Construction (left) and 2 for the landscape (right).
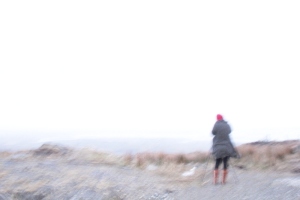
The next image is quite over exposed with an aperture of f 4

Shutter Speed and an aperture of f 16 work well, maybe still a little bit to bright

To blur due to a long shutter speed.

This appears better due a balanced Exposure.

The Shutter Speed indicates how fast the curtains at the film plane open and close, and each shutter speed value also represents a “stop” of light. The shutter speed is measured in fractions of a second.
The shutter speed controls how long light enters the lens and hits the image sensor or film plane. The shutter speed enables me to capture the world in split seconds, but it can also absorb the world at speeds upwards of three and four seconds (or remain continually open up until I want to close the curtain). Snapping the shutter in a fraction of a second, also gives me control on how motion is recorded. If the shutter speed is faster than the object or background, then the image will be tack sharp. If the shutter speed is slower, then I’ll get blurred objects.
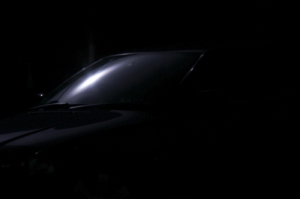
The next four images of a car show different steps of shutter speed.


The next 2 images are already under exposed.
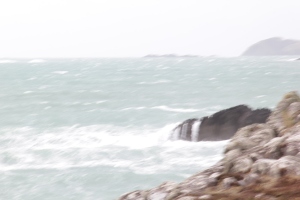
The next 7 images show the different result of changing the shutter speed to alter the perception or rather to focus to the window or the outdoors.


The next 7 images show the change of light in steps through decreasing the shutter speed.


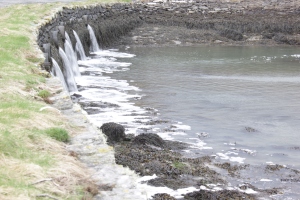
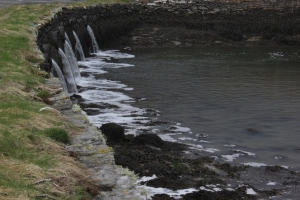
The next 2 images are quiet balanced.

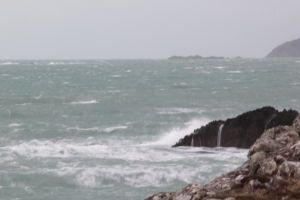
This image has a short shutter speed. The best result to show the stream crisp.

The next 2 images are already blury and brighter.


The next images show the use of the shutter speed to get an image of the fan or rather the running rotor.
Shutter speed is to slow.

Perfect shutter speed. We see the running rotor as a still image.

Wrong shutter speed. We se the fan moving.
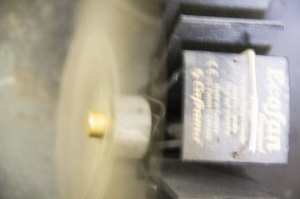
Again. Perfect shutter speed. We see the running rotor as a still image.


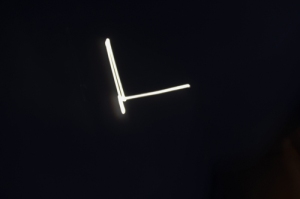
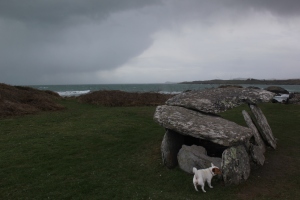
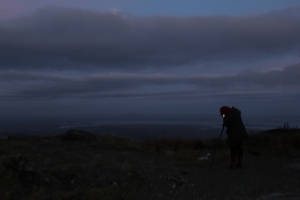
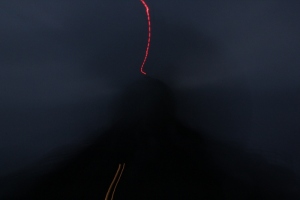
For the next 3 images I used a long shutter speed to play with light or rather with the moon.


ISO, Aperture and Shutter Speed. When these three elements are combined, they represent a given exposure value (EV) for a given setting. Any change in any one of the three elements will have a measurable and specific impact on how the remaining two elements react to expose the film frame or image sensor and how the image ultimately looks.
This image is overexposed. ISO is already quite low. changing the aperture to maybe f 11 might help.


The ISO is quite high. Set it to 400 would help.
A little bit over exposed. Decreasing the shutter speed helps.

Already over exposed. If I want to keep the shutter speed needs a smaller aperture but it is already on f 22

To bright.
Better.
The next 3 images show the difference between changing shutter speed and aperture.

The next 2 images have a slightly different aperture but still work.

If I increase the Aperture or rather the f-stop, I decrease the size of the lens’ diaphragm thus reducing the amount of light hitting the image sensor, but also increasing the DOF (depth of field) in the final image.
Reducing the shutter speed (keeping the shutter open longer) affects how motion is captured, in that this can cause the background or subject to become blurry. It also increases the amount of light hitting the image sensor, so everything is brighter.


This image has an shutter speed of 1 sec. I moved the camera to achieve this effect.

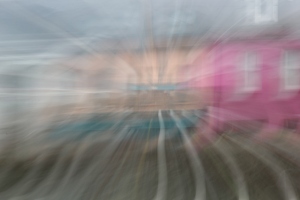
For the next 2 images I played with my zoom.

Increasing the ISO, allows for shooting in lower light situations, but I increase the amount of digital noise inherent in the photo. It is impossible to make an independent change in one of the elements and not obtain an opposite effect in how the other elements affect the image, and ultimately change the exposure value (EV).

ISO Sensitivity
ISO is actually an acronym, which stands for International Standards Organization, and the ISO rating along with the shutter speed and aperture setting are the three elements that determine the final exposure of the photographic image. The ISO rating, which ranges in value from 25 to 6400 (or beyond), indicates the specific light sensitivity. The lower the number, the less sensitive to light the film stock or image sensor is. Conversely, a higher number indicates a higher sensitivity to light, thereby allowing that film or image sensor to work better in low light conditions.


ISO Sensitivity and Image Noise
With film stocks, the lower ISO rating also meant that the photosensitive grains of salt on the film acetate were very fine, thus producing a smoother, cleaner image. A higher ISO had larger, jagged grains of salt, thus producing “rougher” or grainier images. In digital photography, the same logic applies… the lower the ISO rating, the less sensitive the image sensor is and therefore the smoother the image, because there is less digital noise in the image. The higher the ISO rating (more sensitive) the stronger the image sensor has to work to establish an effective image, which thereby produces more digital noise (those multi-colored speckles in the shadows and in the mid tones).
Digital noise is any light signal that does not originate from the subject, and therefore creates random color in an image. The digital camera engineers have designed the image sensor to perform best at the lowest ISO (just like with film). On most digital cameras this is ISO 100, although some high end DSLRs have a mode that brings the ISO down to 50 or even 25.
In the old fashioned non-digital image many film photographers found ways to creatively and artistically utilize the grain to affect the final mood and tone of an image. Unfortunately, due to the nature of digital noise (as it manifests as random clumps of colored speckles), it is highly undesirable.
- The lower the ISO rating the better the image quality is going to be!!
I discovered that by default “Auto ISO” setting reduces my control because it can automatically set a higher ISO, which will result in a grainier (noisier) image when other settings could have created an acceptable exposure with less noise.
Increasing ISO affects image quality in two major ways:
1) The distinction between fine details is reduced.
2) When I enlarge the image and make digital prints, or when I save the image as a jpeg (which has a high level of compression), the inherent high level of digital noise will result in a “muddier” image after conversion.
Lower ISO images will be more color-accurate and more aesthetically captivating. ISO between 100 and 200 will give me the best results.Due to the image sensor and the Canon D60 engineering I can get away with ISO 400 and still have clear, clean and sharp images for the vast majority of enlargements.
The image sensor’s light sensitivity (ISO) is important when acquiring and crafting any digital photographic image, and the reciprocal scale basically trades off a smooth final image with higher ISO rating. The image sensor’s light sensitivity is important in how I craft my photographs. I might need to bring in additional light sources to keep the ISO as low as possible for smoother photos.
When I am faced with adverse lighting conditions (i.e. low light or high contrast lighting) or I require higher shutter speed I must sacrifice the smoothness available with a low ISO to get the shot with a higher ISO. I have to increase the ISO and deal with the consequences later, because if the alternative (a lower ISO setting) means that I miss the shot, then it is better to make the trade off.

Focus
What is focus? In photography, it’s practically married to sharpness. An image that is completely sharp is said to be in-focus. An image that’s completely blurry is said to be unfocused. In order for a camera to create a focused image, it takes light and runs it through a lens, concentrating the rays on the image sensor inside. The size of the hole the light travels through (the aperture) determines how focused those rays are once they hit the sensor. Smaller holes do a better job of focusing light than larger holes.
In terms of actual camera settings, larger f-numbers correspond to smaller apertures. At F22, the depth of field (or focus range) is much larger than at F4. I can use depth of field to emphasize certain parts of an image. That’s one reason why F4 is such a good aperture for taking portraits. I can focus on the eyes alone while the background gets completely blurred out. The small depth of field makes a face stand out from the background.
There are a lot of situations where I don’t want the entire image to be in focus. Backgrounds tend to get in the way, and they will distract the viewer from the point I am trying to make.
Portraits look a lot better when the background is somewhat out of focus.
Drawing attention to things that don’t stand out on their own is much harder. When we focus our eyes, we do something similar. Everything else in our peripheral vision appears a little more hazy. Most of the time, only one part of our images attends really sharp. On that note my next images will explore the advantage of Focus in and out.
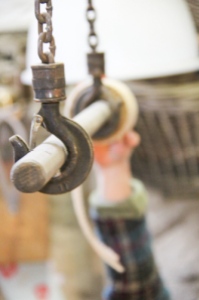
In this image the chain is out of focus.

Chain is in focus.

Chain is in focus and the background is more blury than in the image before.

The second hook is in focus.

The first hook is in focus.
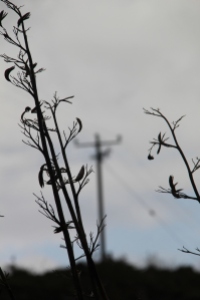
The power pole is focused.

The plant is in focus.
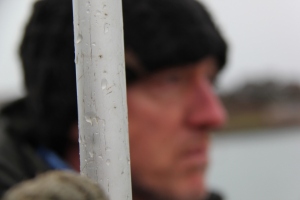
The background is focused.

The front is focused.

Here the rope is focused.

The rope is unfocused and the middle is crisp.

Again the middle is focused.
Still the middle, but the profile is already more crisp than before.

The profile is focused.

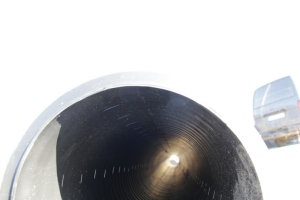
The next 6 images are all out of focus and show different steps I like the blurry effect of it.


This is the crisp image of the pipe.

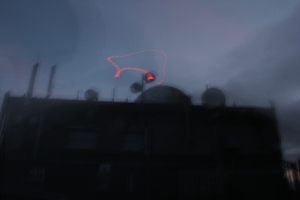
For the next 4 images I used again a high ISO and a long shutter speed to get the effect of the lights.


This image has a slow shutter speed and a low ISO
Lower ISO ratings produce color-accurate, smooth and aesthetically appealing images requires ideal lighting conditions. Shooting in low light conditions or stopping fast-moving objects (a humming bird, a race dog or a carousel). In both situations, I need higher ISOs to capture those images with an acceptable exposure. With the higher ISOs, I can use faster shutter speeds to eliminate motion blur and/or camera shake. In the event that I want to use motion blur creatively, then decreasing the ISO is simple, and I can then decrease the shutter speed (less than 1/30s) to achieve the desired motion blur and still have smooth, noise-less images.

Auto Bracketing
Overexposure & Underexposure
Overexposure is when the information in the highlights is effectively unreadable. When there is this type of excessive loss of image information there is no way to “retrieve” that missing information in the digital dark room. Underexposure is pretty much the same concept; except in this case there is no image information contained within the shadows. This non-existant information cannot be retrieved through post processing either. In digital photography, once that image information is gone, there’s no way to retrieve it. This is not always the case in the photochemical world of film photography. With film (as opposed to digital) processing, it is possible to “find” image information in an excessively underexposed frame, and perhaps “find” image information during the printing process for seriously overexposed images as well.
AE LOCK (AEL)
Auto Exposure Lock is a camera setting in which the EV is locked in (when I am shooting one of the semi-automatic or fully automatic modes, i.e. Shutter-priority), so that now matter what changes there are to the lighting in the scene, the camera locks in the ISO, Shutter and/or Aperture settings, so I can continually achieve the same EV without having to re-meter the scene.
Depth of Field
Depth of Field (DOF) is the front-to-back zone of a photograph in which the image is razor sharp. As soon as an object (person, thing) falls out of this range, it begins to lose focus at an accelerating degree the farther out of the zone it falls; e.g. closer to the lens or deeper into the background. With any DOF zone, there is a Point of Optimum focus in which the object is most sharp. There are two ways to describe the qualities of depth of field – shallow DOF or deep DOF. Shallow is when the included focus range is very narrow, a few inches to several feet. Deep is when the included range is a couple of yards to infinity. In both cases DOF is measured in front of the focus point and behind the focus point. DOF is determined by three factors – aperture size, distance from the lens, and the focal length of the lens. Let’s look at how each one works.

Aperture
The aperture is the opening at the rear of the lens that determines how much light travels through the lens and falls on the image sensor. A small set of blades in the lens controls how much light will enter the camera.

If I shoot with the aperture wide open, then more light is allowed into the camera than if the aperture is closed down to only allow a tiny hole of light to enter the camera. The size of the aperture’s opening is measured in f-stops – one of two sets of numbers on the lens barrel (the other being the focusing distance). The f-stops work as inverse values, such that a small f/number (say f/2.8) corresponds to a larger or wider aperture size, which results in a shallow depth of field; conversely a large f/number (say f/16) results in a smaller or narrower aperture size and therefore a deeper depth of field.
Manipulating the aperture is the easiest and most often utilized means to adjust Depth of Field. To achieve a deep, rich and expansive DOF, I’ll set the f-stop to around f/11 or higher. This principle demonstrated when I look at photos taken outside during the brightest time of the day. In such a case, the camera is typically set at f/16 or higher (there is a Sunny 16 Rule) and the Depth of Field is quite deep – perhaps several yards in front of and nearly to infinity beyond the exact focus point.
Let’s take a look at these two photos as examples. The photo on the left has an expansive DOF, most likely shot around noon (notice the short, but strong shadows), with an f/22 aperture. The photo on the right has an extremely shallow DOF; probably an f/2.8 aperture setting. However, to achieve an identical proper exposure, the shutter speed is probably closer to 1/1000th to compensate for the increased amount of light entering the lens at f/2.8.

Each f-number is represents one “stop” of light, a stop is a mathematical equation (which is the focal length of the lens divided by the diameter of the aperture opening) that determines how much light that enters the lens regardless of the length of the lens. Such that an f/4 on a 50mm has smaller opening than an f/4 on a 200mm, but an equivalent amount of light travels through both lenses to reach the image sensor thus providing the same exposure. Each movement up the range (say f/2 to f.2.8) reduces the amount of light by one-half and each movement down the range (say f/11 to f/8) doubles the amount of light passing through the lens. This concept works in tandem with the shutter speed to establish a given exposure value.
Basically: When I change the aperture size one stop, I have to shift the shutter speed one stop in the opposite direction to maintain a consistent exposure
… and this change in aperture alters the depth of field (DOF) accordingly.
Distance from the Lens
The last element affecting depth of field is the distance of the subject from the lens – I can adjust the DOF by changing that distance.
- The closer an object is to the lens (and the focus is set on that object) the shallower the DOF.
- The farther away an object is and focused on, the deeper the DOF.
Changing the distance to subject is the least practical way to manipulate the depth of field, and by changing the distance from a subject to the lens, I immediately change my image’s composition. To maintain the compositional integrity of the shot, but still have the change in DOF from a distance, I can change the focal length (either by changing lenses or zooming in).
- Manipulation of depth of field is a good way to modify the characteristics of my photo, and manipulating the aperture is the ideal way to do this because it has little or no effect on composition. I simply need to change the shutter speed (or change the light sensitivity – ISO) to compensate for the changes in the exposure from the adjustments to the f-number.
- Changes in distance and focal length also affect DOF, but these changes have trade-offs in terms of composition. Therefore, changes to aperture are the best way to manipulate DOF without affecting a photo’s composition.
Great research and photos 😉
Thank you Miss Cox. It was a great journey. All the best from Ireland. xx Detlef 🙂